Set up and run your project up locally
Introducing
divio logindivio project listdivio project setupdocker-compose up
The next step is to set up your project on your own computer, for development purposes and also to understand better how the system works.
For this, we will use the Divio CLI that you installed in the Installation section.
Log in with the CLI
Run:
divio login
This will fetch a token from https://control.divio.com/account/desktop-app/access-token/.
Upload your public key to the Divio Control Panel
Upload your public key to https://control.divio.com/account/ssh-keys/
Note
If you need help with setting up public keys, see GitHub’s excellent guide.
Set up your project locally
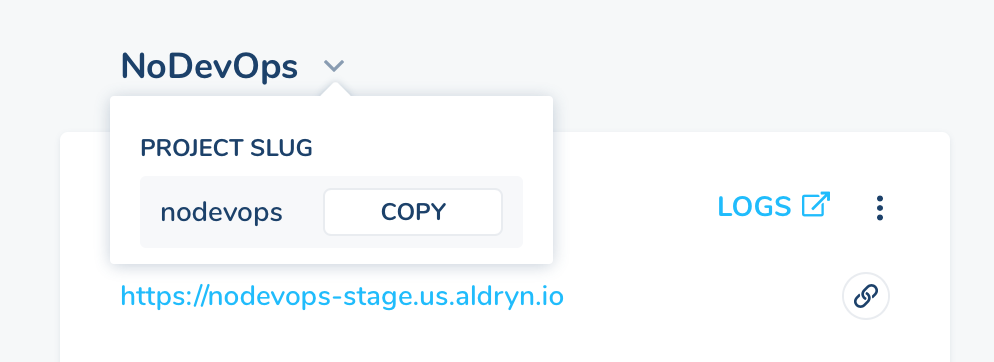
Get your project’s slug from the Control Panel:
Or you can see it by listing your projects:
divio project list
Set up the project:
divio project setup <project slug>
This will build your project.
Explanation
Optional further reading: What happens during the set-up process of a Divio project?
Run the local site with docker-compose up
cd into the project directory, and to get the site up and running, execute:
docker-compose up
You should be able to log in to your site at http://localhost:8000.
docker-compose up is one of the key commands for working with your Docker project locally.
Stop the project
If you hit control-c in the console when the project is running, it will stop it.